Managing Multiple Locations
Overview
Each location is setup as a separate TablesReady account — this allows you to keep your waitlists completely separate and customize notifications for each location.
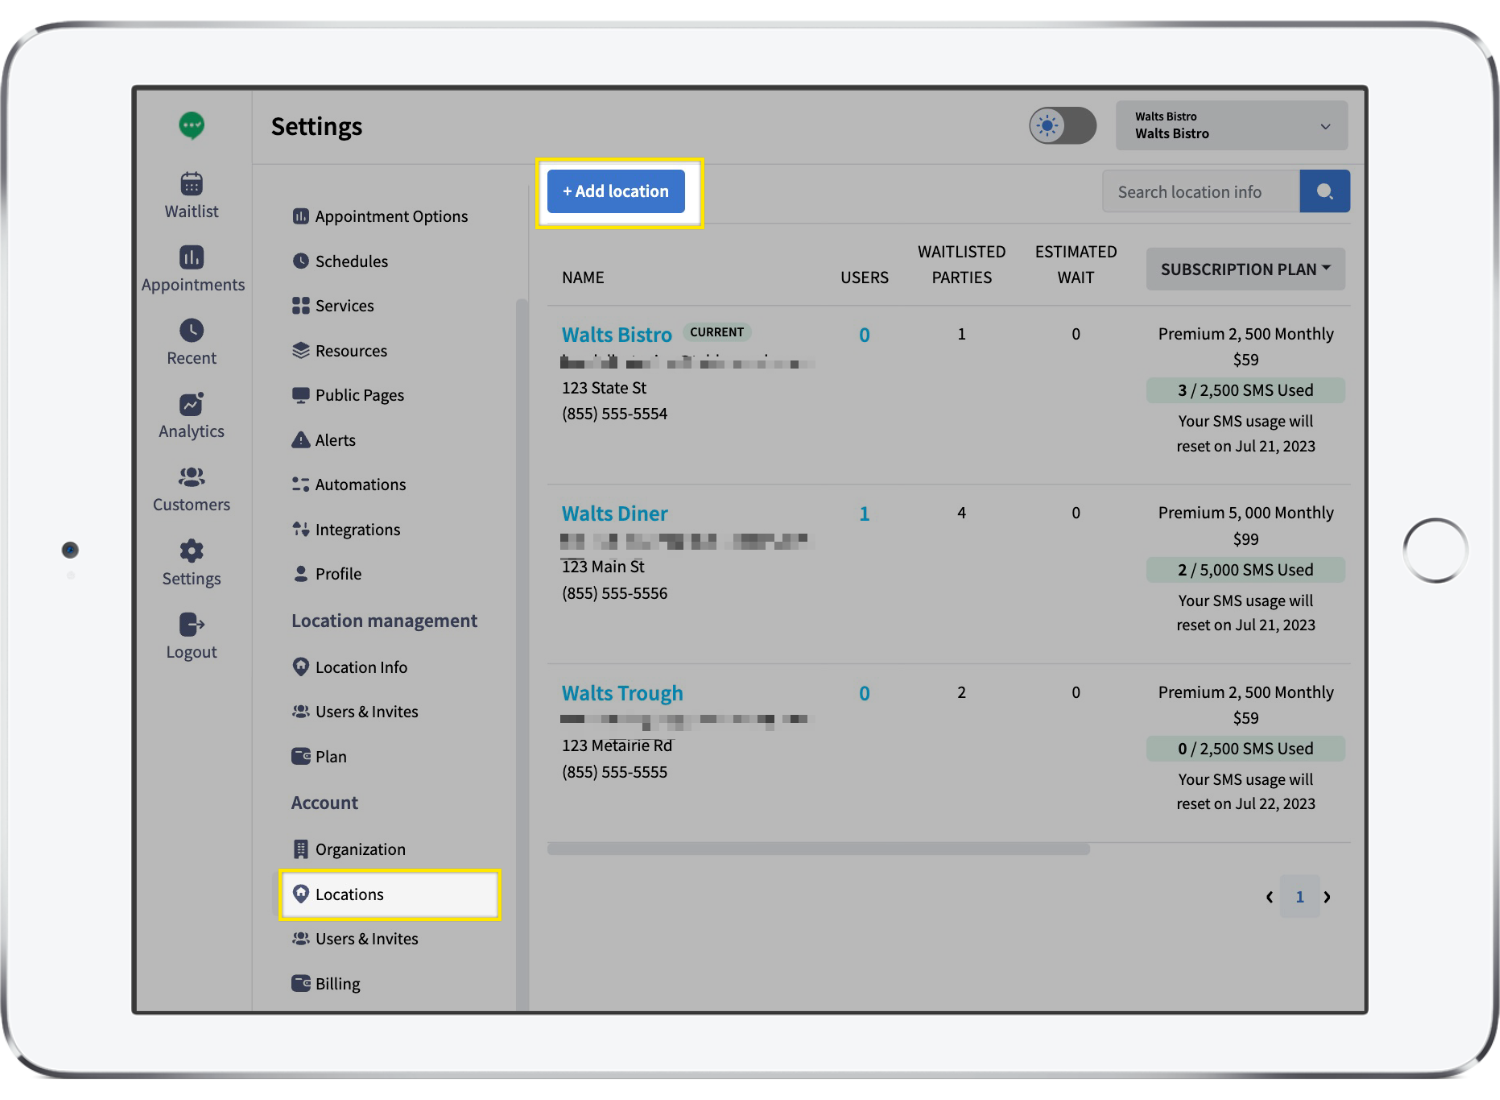
You can manage all of your accounts/locations from the Settings > Account sections in the main admin account:

The Location management sections are specific to the account/location you're currently logged into.
Switching Between Accounts
If you have access to multiple accounts, you can switch between them using the dropdown menu in the upper right corner:

Adding a New Location
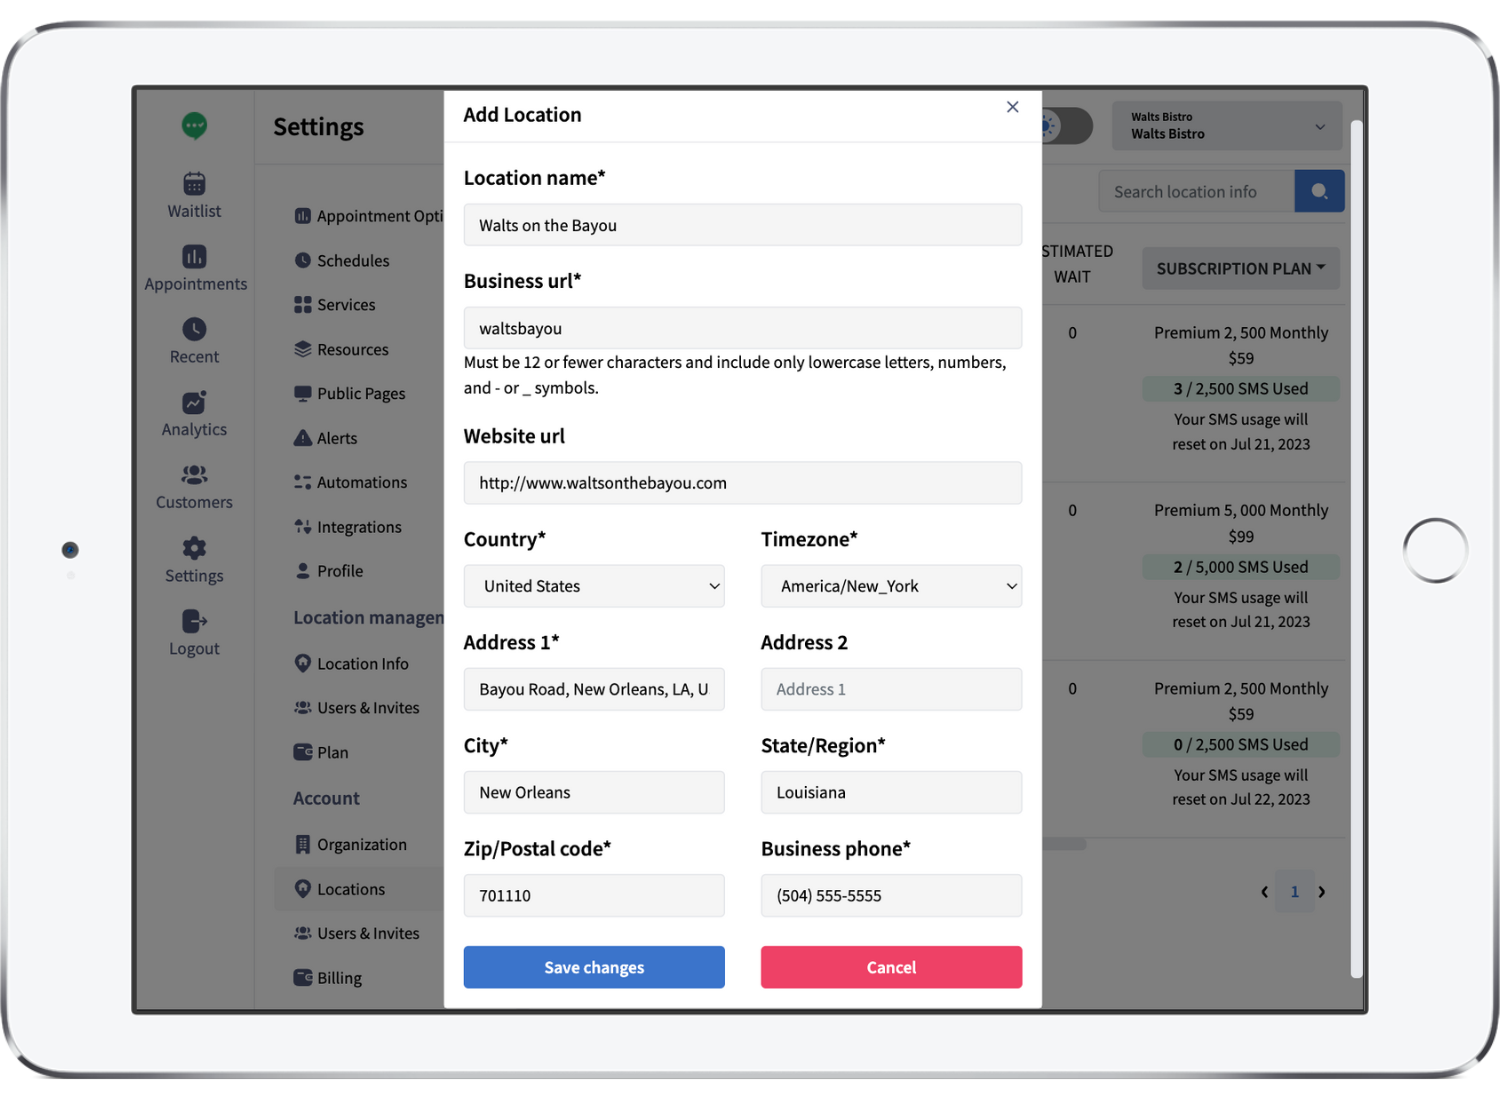
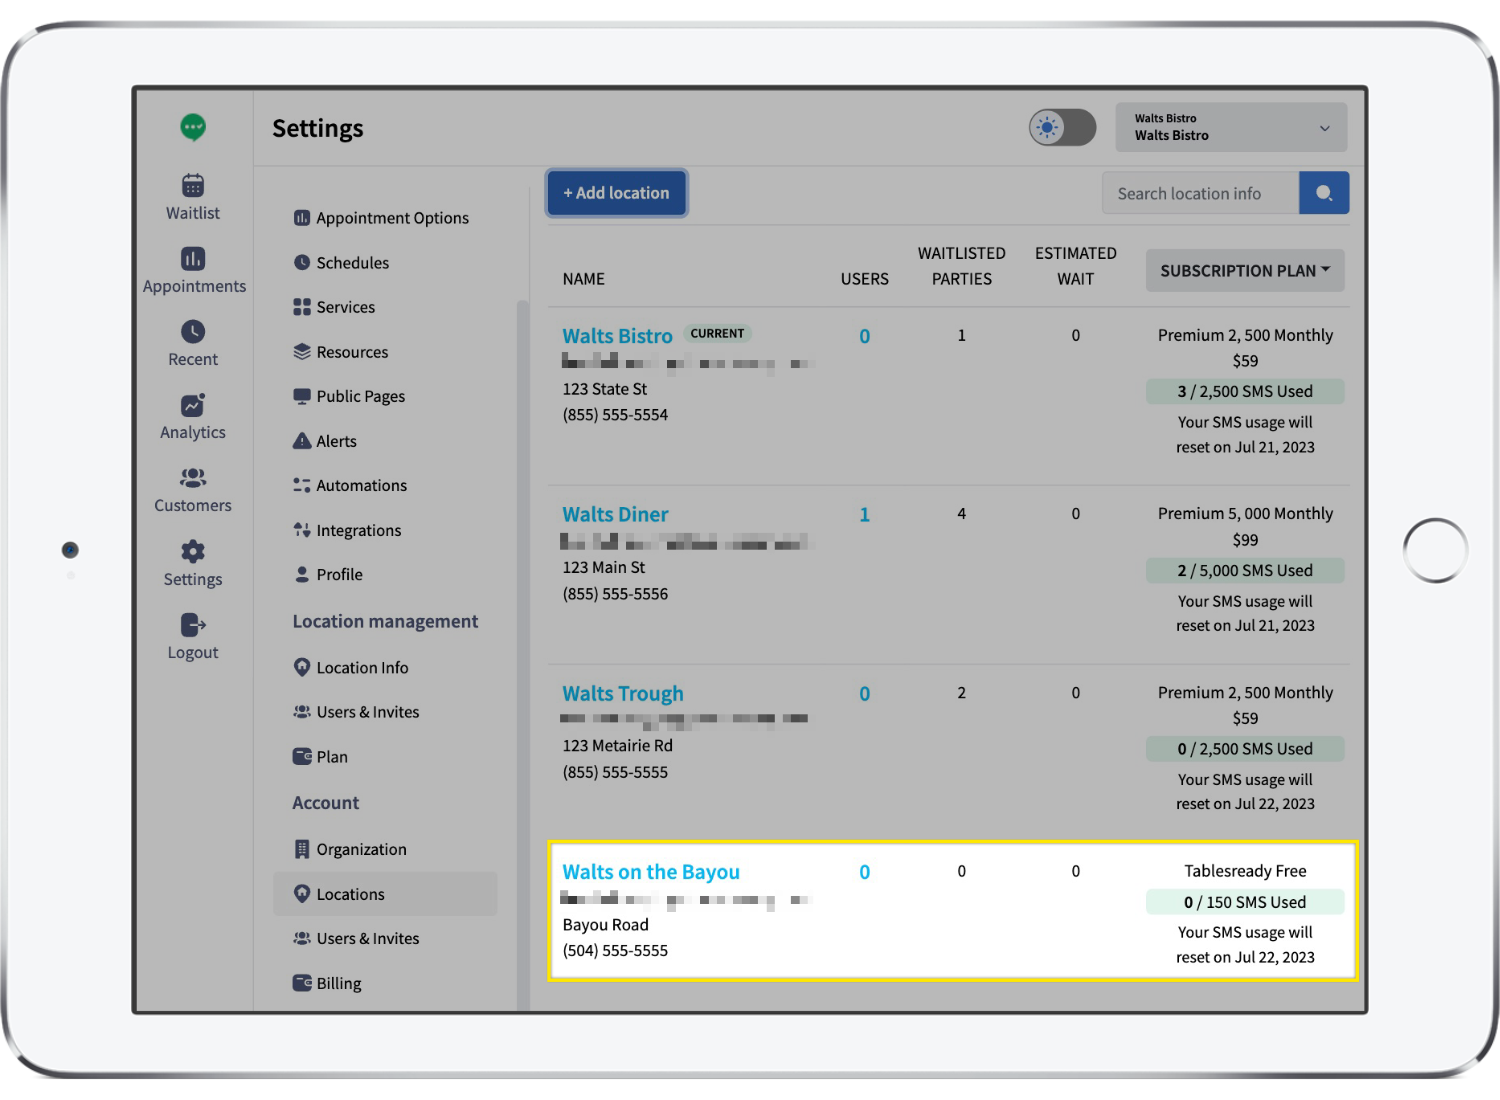
The account Admin can add new locations in the Settings > Account > Locations section.
To subscribe the new account to a paid plan, go to Settings > Account > Billing and click Manage next to the new account:

You'll be taken to the Location management > Plan section of that particular account, where you can choose a plan and subscribe:

Your existing billing information will automatically be transferred to the new account; it is not possible to use different billing methods across accounts.
Modifying a Subscription
You can upgrade, downgrade, pause, and cancel subscriptions in the Settings > Account > Billing section.
Click Manage next to the subscription you want to modify:

You'll be taken to the Location management > Plan section of that particular account, where you can upgrade, downgrade, pause, cancel, or reactivate your subscription:
